News

RSS

Revolutionizing Orthotics and Prosthetics with EXScan O&P and EinScan H2 0

In the rapidly advancing world of orthotics and prosthetics (O&P), precision, comfort, and speed are essential. Traditional methods of crafting orthopedic devices are often time-consuming and prone to inaccuracies. That’s where cutting-edge 3D scanning solutions like the EinScan H2 and the specialized EXScan O&P software step in—delivering a powerful, user-friendly, and highly accurate solution tailored specifically for O&P professionals.

What Is EXScan O&P?

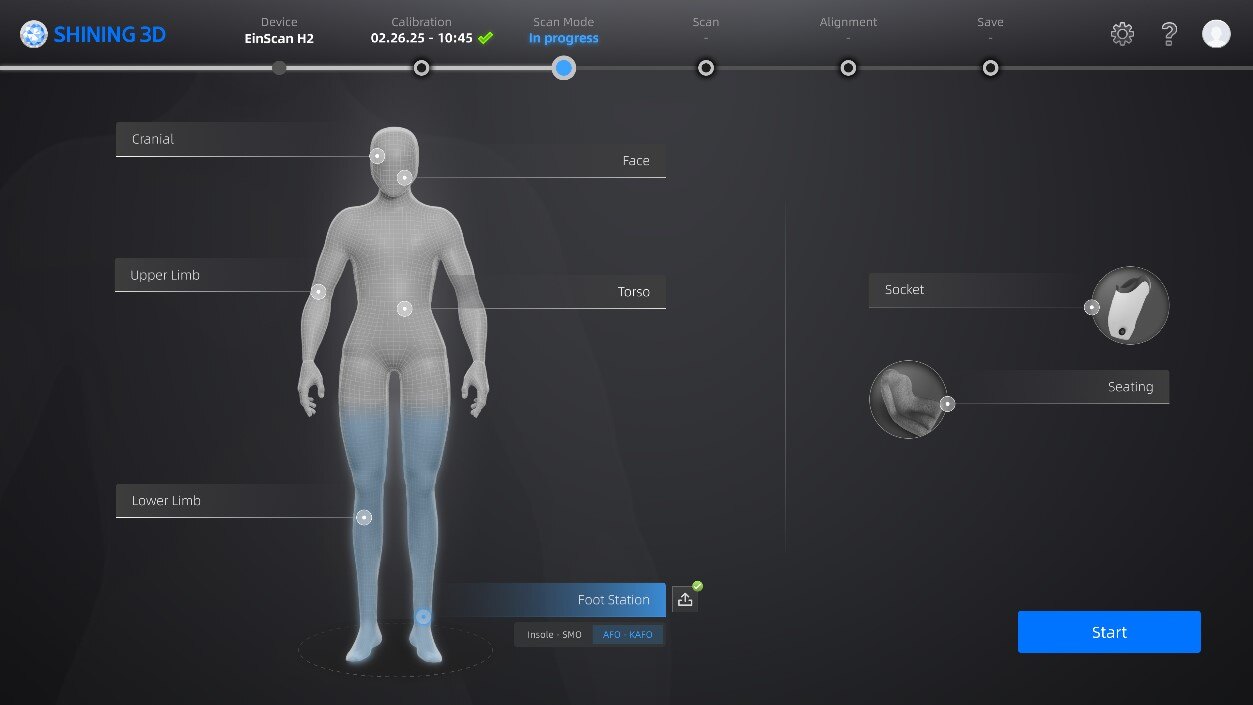
EXScan O&P is a dedicated 3D scanning software built for seamless integration with the EinScan H2 handheld 3D scanner. Designed specifically for orthotic and prosthetic applications, it empowers clinicians and technicians to digitize the human body with remarkable precision—streamlining workflows from scanning to fabrication.

Key Features of EXScan O&P:

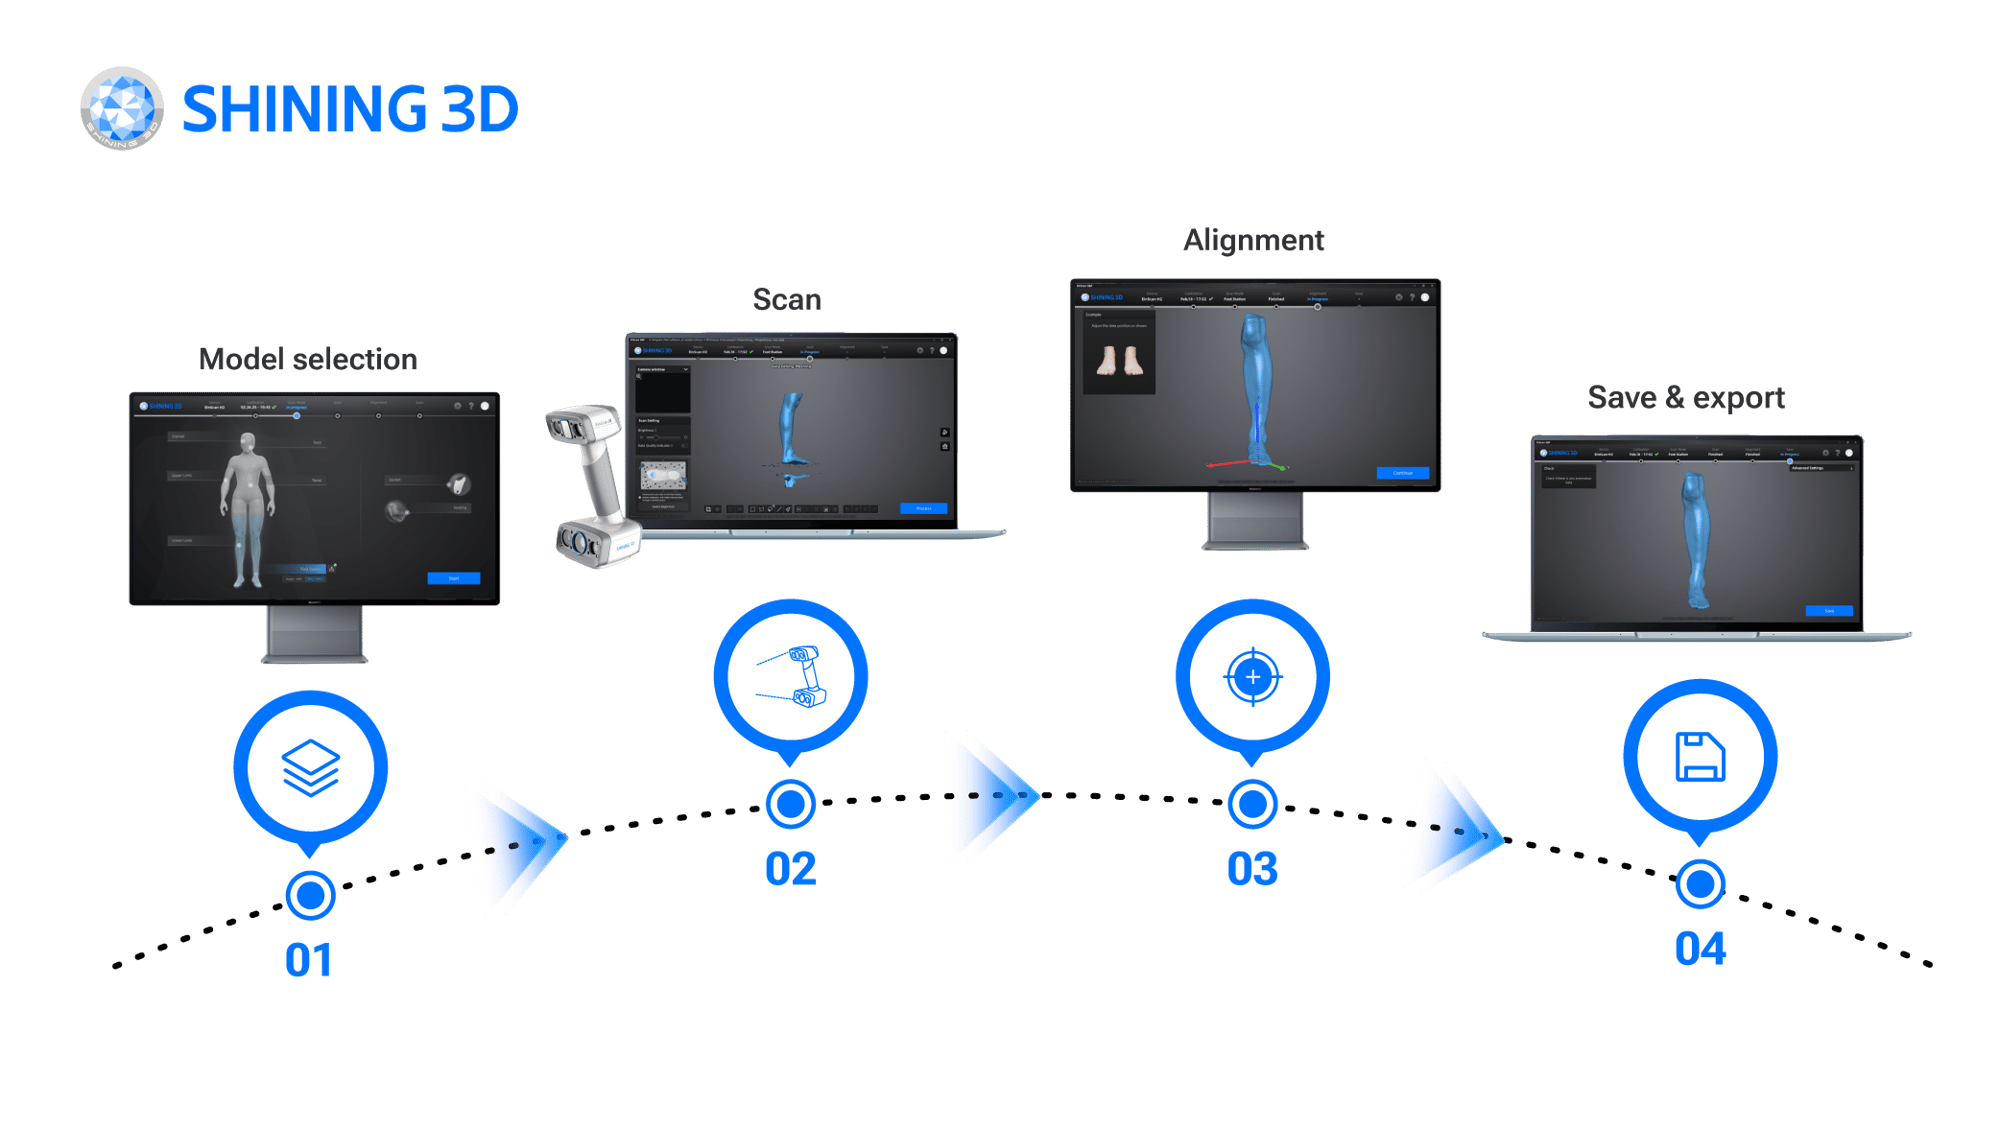
  • Intuitive & User-Friendly Workflow: Simple step-by-step interface ideal for busy clinics.

OP软件落地页所需图片

  • Versatile Scanning Modes: Supports a full range of anatomical parts including cranial, facial, limbs, torso, feet, sockets, and more.

SW

  • High-Quality 3D Data Output: Accurate, clean mesh generation for CAD/CAM workflows.

screenshot_2025-02-19_16-21-58

  • Complete Integration with EinScan H2: Optimized for smooth operation with the scanner's hardware capabilities.

EXScan O&P (for EinScan H2) Software Download

Benefits of EXScan O&P in the O&P Industry

Client Safety & Comfort

The process is clean, neat, and completely risk-free, ensuring safety and comfort for both clients and clinicians.

Accuracy of shape capture

Eliminates cast distortion and human error with accurate shape capture, enabling CAD modification and additive manufacturing.

Faster Client Delivery

The streamlined process reduces delivery time while ensuring improved comfort and fit for clients.

Efficient Justification Process

Digital archives enable before/after change demonstrations and streamline handling justification and less documentation requests.

Track, Repeat, Duplicate

Accurately reproduces OP devices, accommodates revisions easily, and ensures consistent quality and fit.

Portable Clinic Solution

Lightweight, easy to set up, and mess-free, with instant electronic scan transfers to the lab, saving shipping time.

EinScan H2 – Advanced 3D Scanning Solution

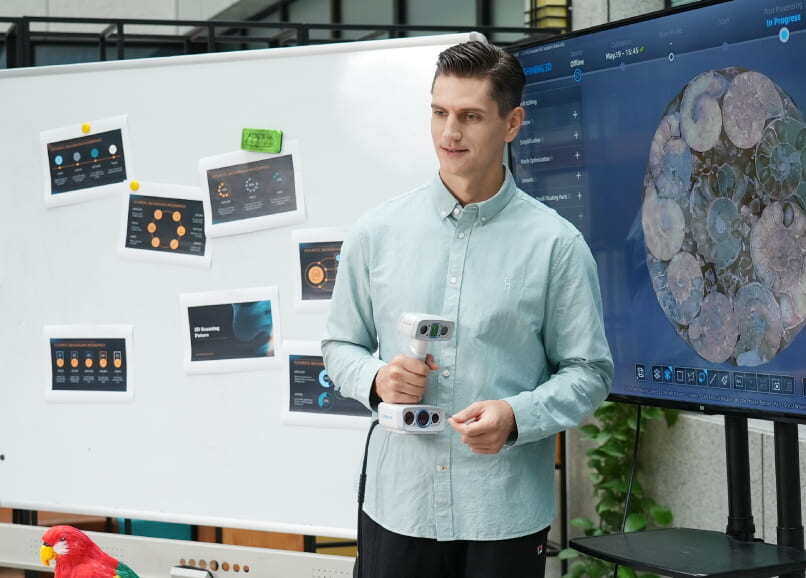
Engineered for mobility and ease of use, the EinScan H2 weighs just 730g and features an ergonomic, portable design—perfect for on-site scanning in clinical settings or remote locations.

With its non-contact structured light technology, the EinScan H2 effortlessly captures high-precision 3D models of the human body, even allowing for minor movement during the process. This modern approach eliminates the need for messy, time-consuming plaster molds, offering a cleaner, more comfortable experience for both clinicians and clients.

At the heart of this powerful workflow is the EinScan H2—a next-generation handheld 3D scanner that brings unmatched scanning capabilities to O&P professionals.

Technical Highlights:

  • 5MP Texture Camera
  • 3 VCSEL Projectors
  • Accuracy up to 0.05 mm
  • FOV up to 780 x 900 mm

High-Resolution Texture Like Never Before

The EinScan H2 takes handheld 3D scanning to the next level with a powerful 5MP texture camera, enhanced accuracy, and three infrared VCSEL projectors. These upgrades work together to deliver stunningly photorealistic textures and highly detailed 3D data—perfect for applications where visual fidelity and precision matter most.

Hybrid Light Source

The EinScan H2 combines structured light and infrared technology, making it versatile for a wide range of scanning scenarios. It captures the intricate details of complex surfaces and dark materials with precision.

  • LED light enables fast 3D scanning with accurate, high-quality data.
  • Infrared VCSEL is ideal for capturing dark surfaces, the human body, and objects in bright-lit environments.
EinScan H2 hybrid light source 3D scanner

Photorealistic Texture

Equipped with a 5MP color camera, the EinScan H2 captures vibrant colors and detailed textures, combining them with precise 3D geometry to produce photorealistic 3D models. It's an ideal 3D scanner for cultural heritage preservation, art restoration, digital archiving, and other applications requiring high-quality textures.
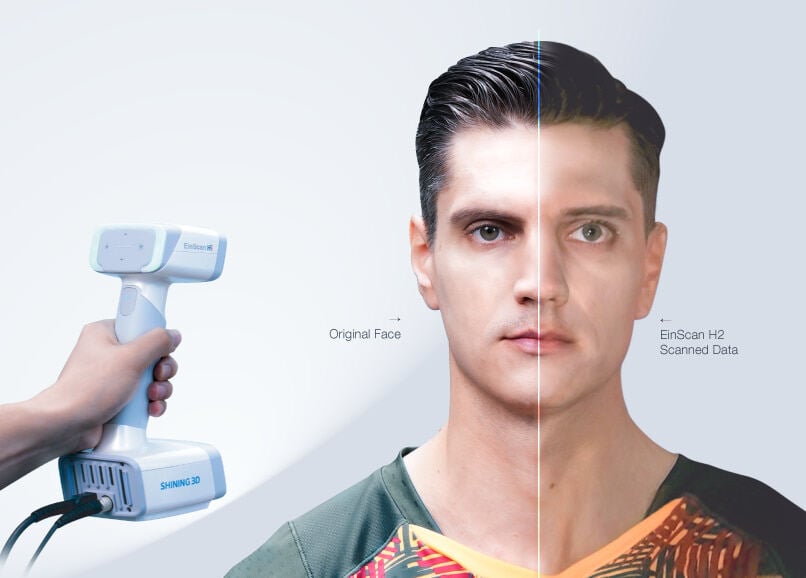
Face 3D scanner EinScan H2

High-Quality Data

The LED light modes enable fast 3D scanning with high precision, delivering data with an accuracy of up to 0.05mm—ideal for applications such as reverse engineering. The infrared light mode simplifies the scanning of dark surfaces, ensuring complete and high-quality results even in difficult conditions
EinScan software rich details

Versatile, Marker-Free Scanning

The working distance adjusts from 200 mm to 1500 mm, making it versatile for both narrow and wide scenes, as well as objects of varying sizes. Its wide field of view, up to 780 × 900 mm, enables quick and efficient capture of large objects. Additionally, the marker-free scanning feature simplifies the process by using rich geometric features, eliminating the need for markers.
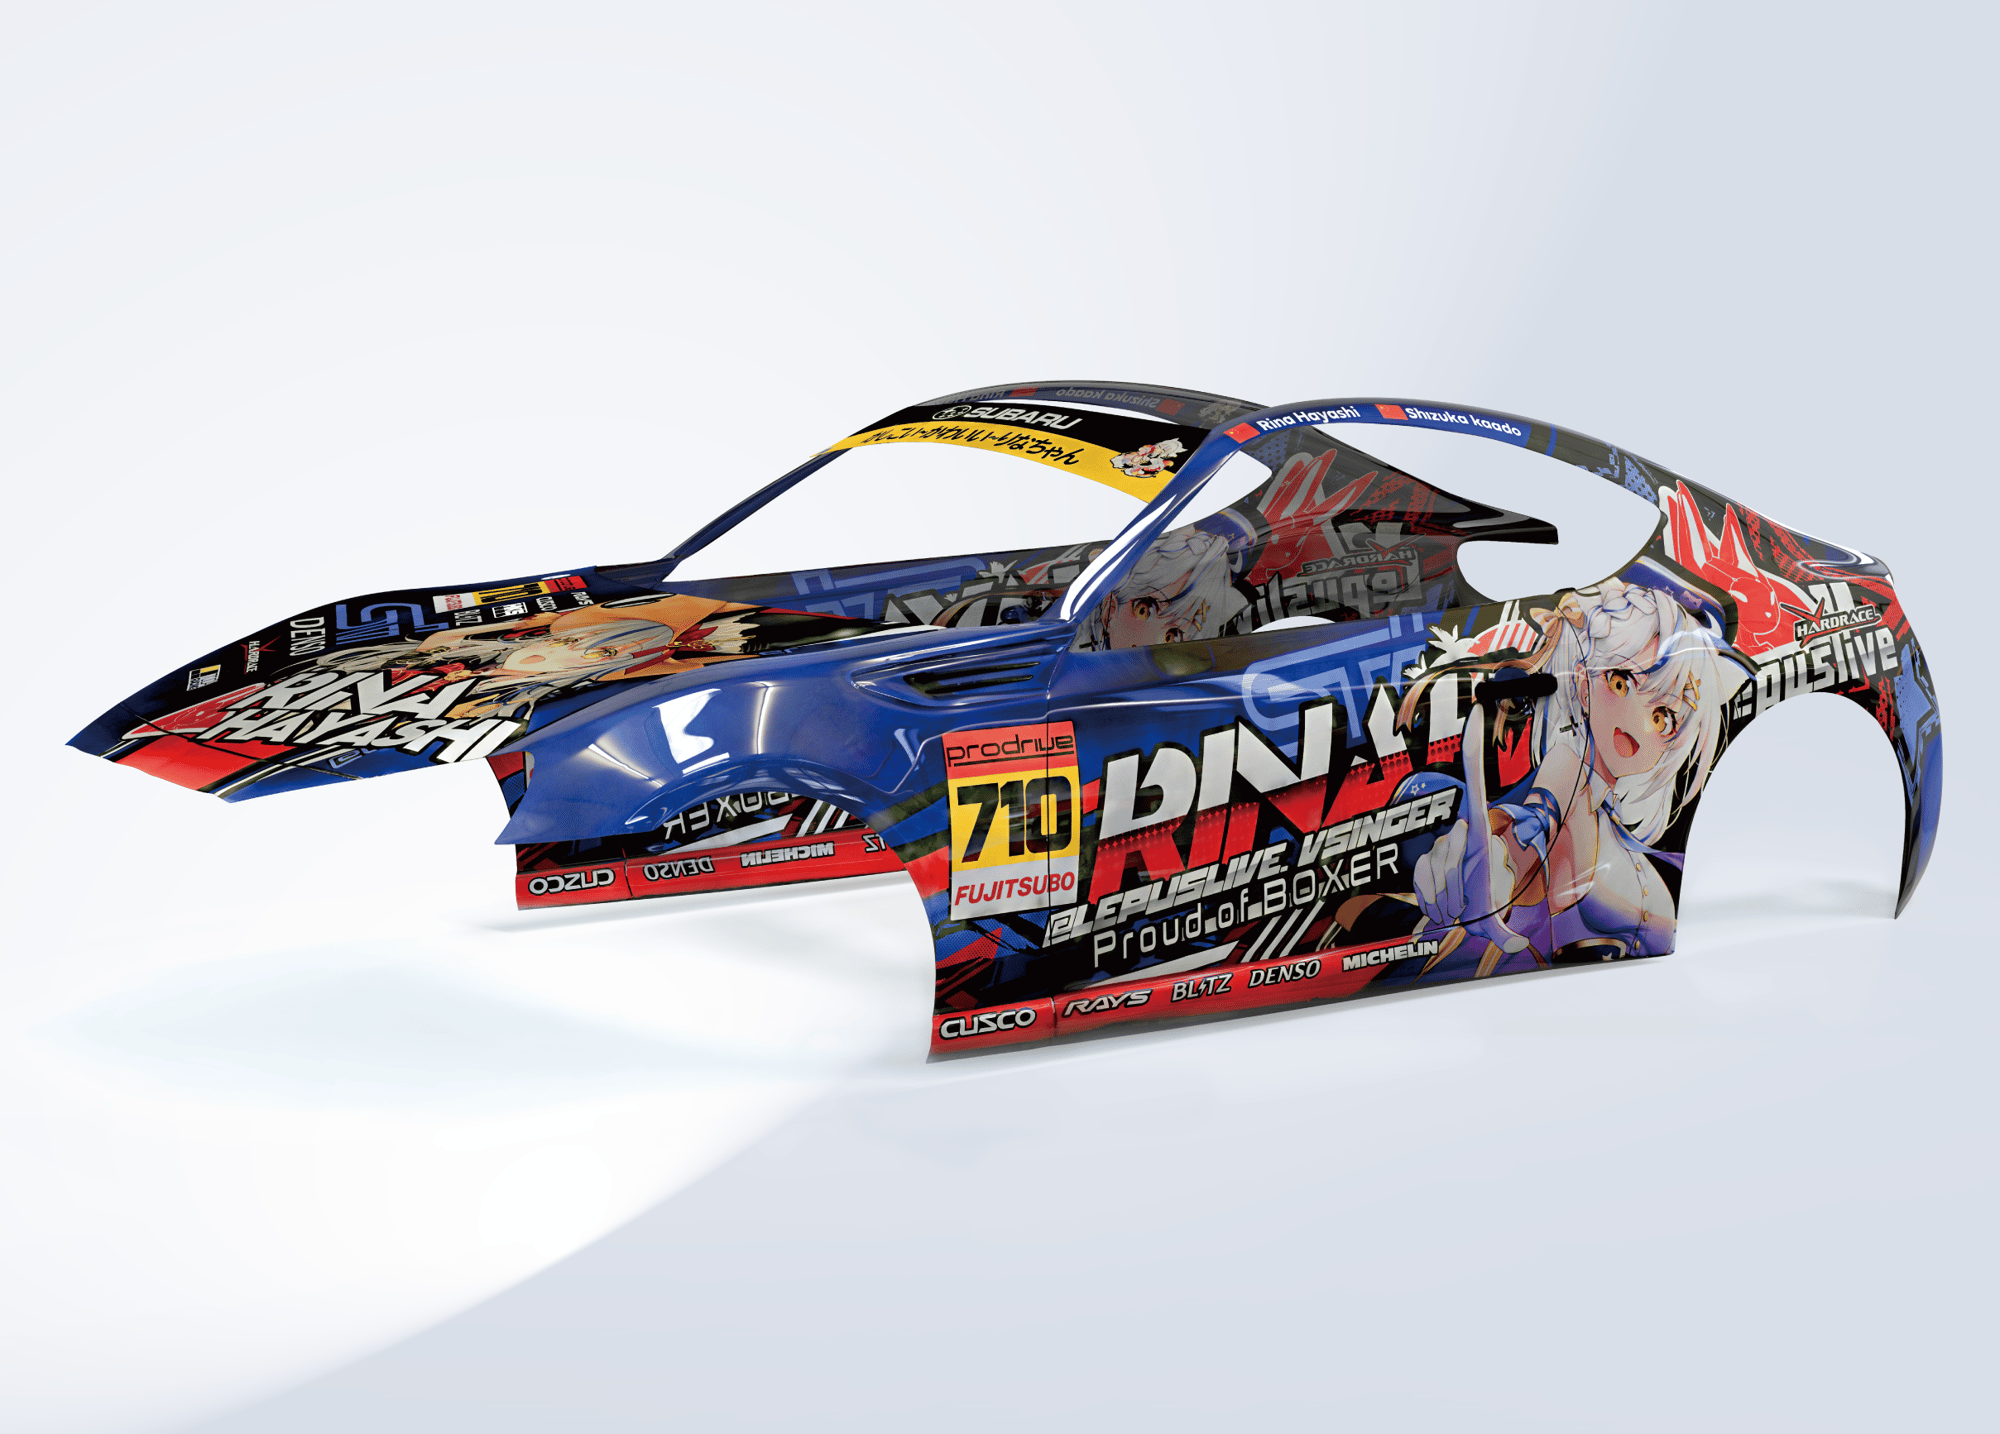
Versatile, Marker-Free Scanning-1

User-Friendly Software

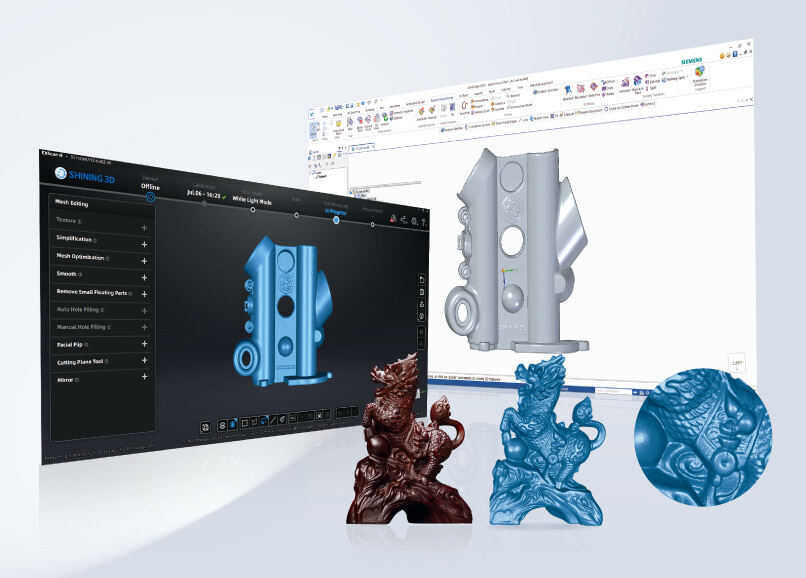
The EinScan H2 provides a professional yet easy-to-use 3D scanning interface. It includes powerful post-processing tools, such as alignment, merging, and mesh editing, to ensure a smooth workflow from scan to finished model.
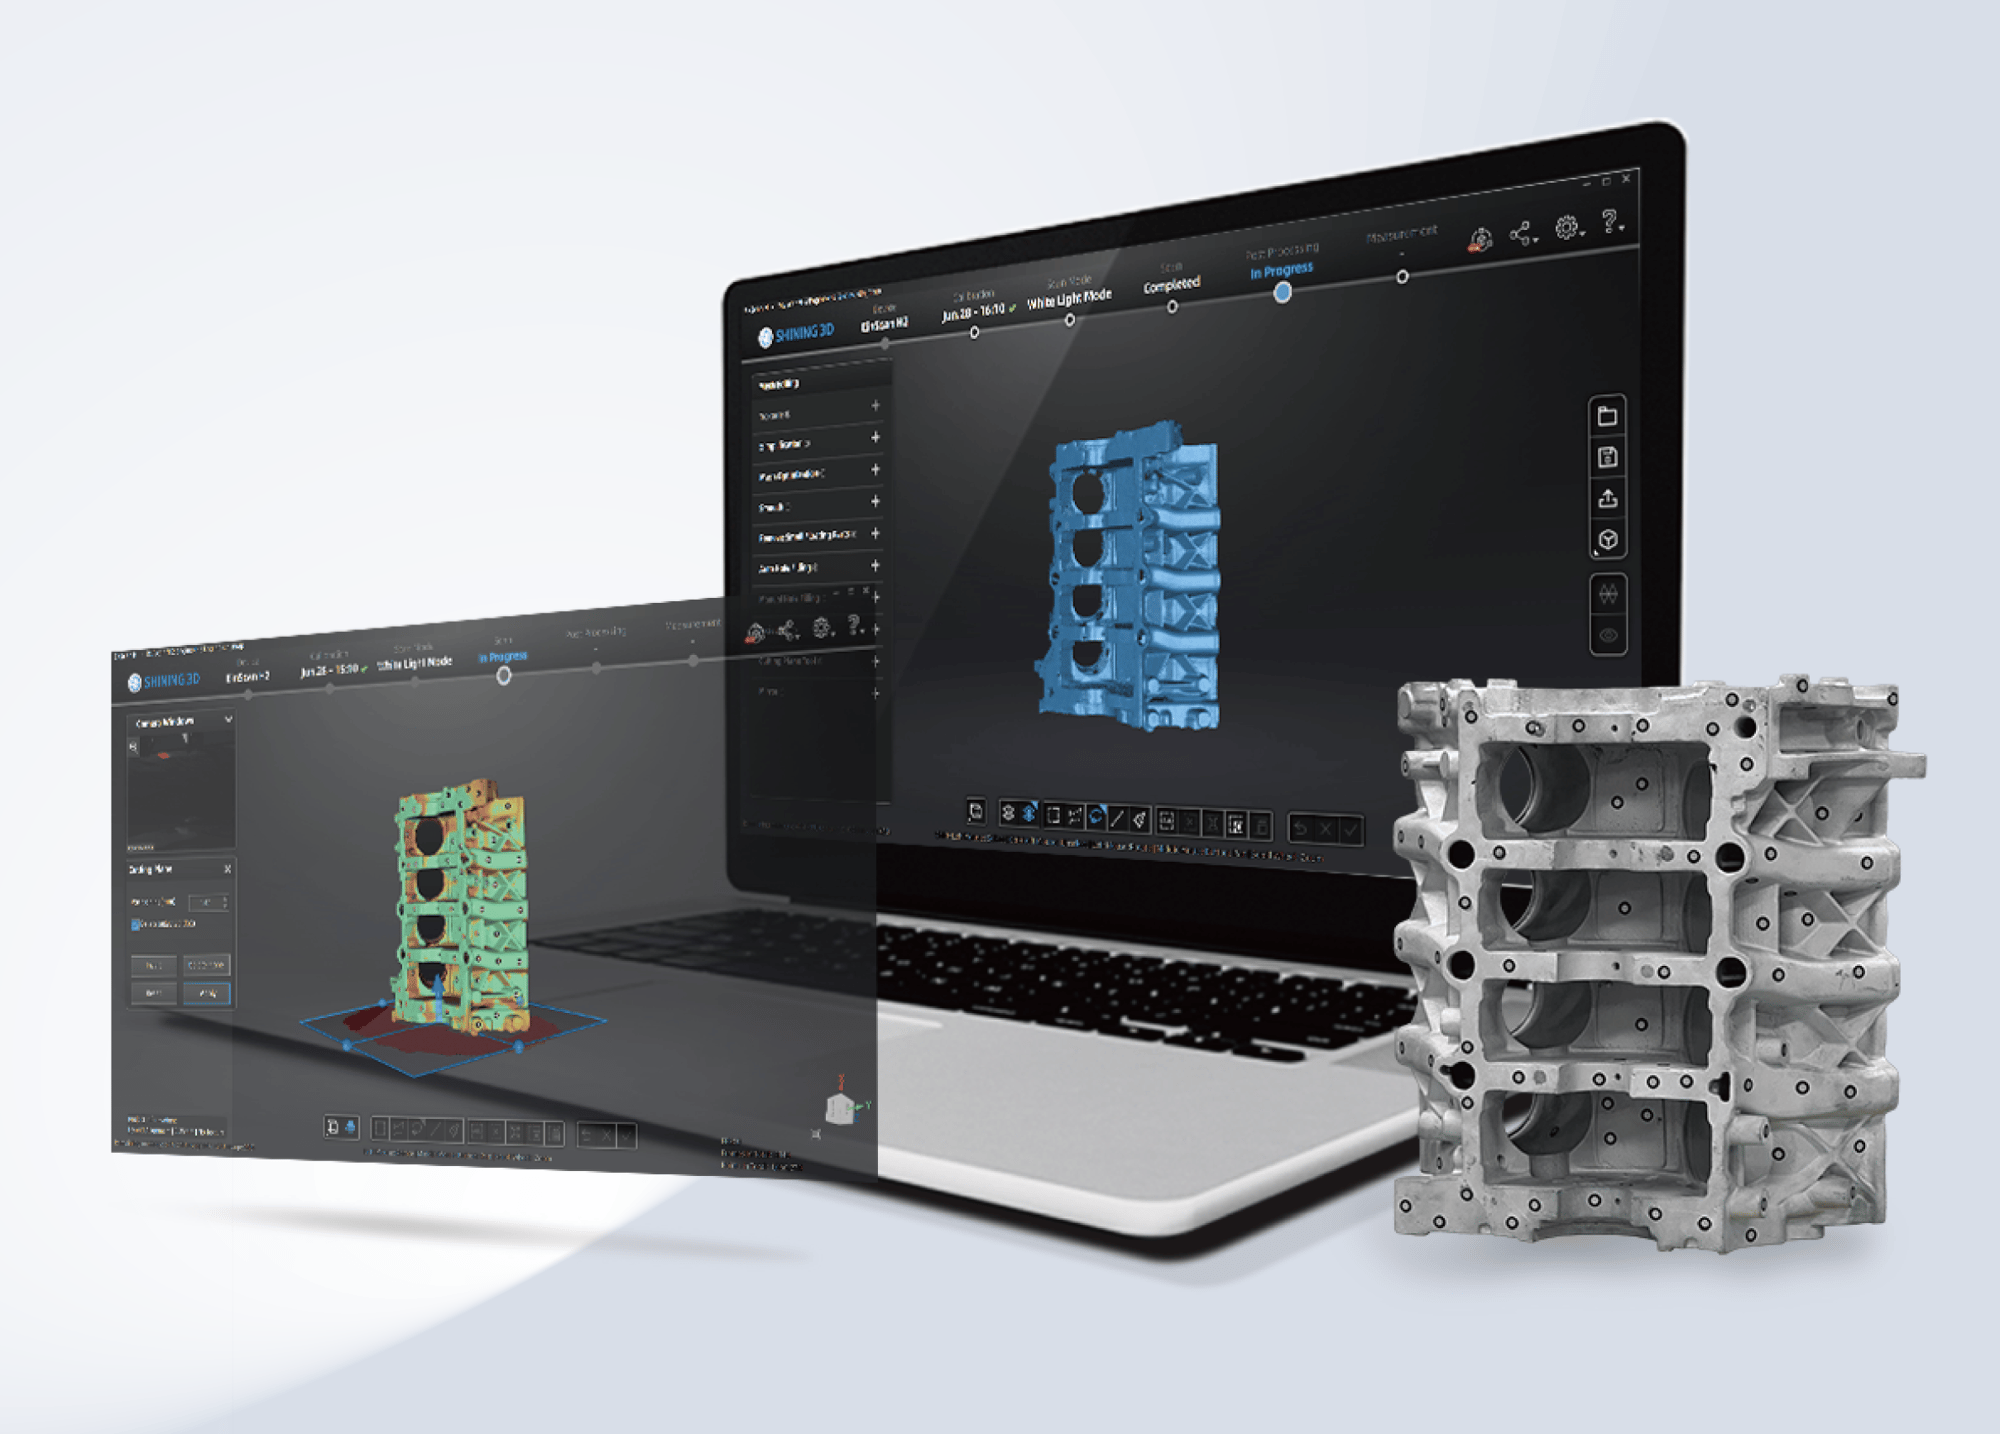
User-Friendly Software-1


Streamlined Digital Workflow for Modern O&P Clinics

When combined, EXScan O&P and the EinScan H2 offer a complete digital solution that transforms the O&P workflow. Clinicians can scan, process, and transmit 3D models directly to labs, cutting out plaster molds, shipping delays, and inconsistencies. This streamlined digital approach enhances the quality of care and accelerates delivery times—without sacrificing accuracy or comfort.

Who Can Benefit?

Whether you're a clinician looking to enhance client outcomes, a lab technician aiming to streamline operations, or a facility manager looking for scalable, efficient solutions—this scanning system is designed with you in mind.

Final Thoughts

The future of orthotics and prosthetics is digital—and EXScan O&P paired with the EinScan H2 is leading the charge. With intuitive software, high-resolution 3D data capture, and a seamless digital workflow, these tools are redefining what’s possible in personalized patient care.

Ready to bring your O&P practice into the future? The EinScan H2 and EXScan O&P are the tools you’ve been waiting for.

  • Store Front

How to Configure Bambu Lab 3D Printers for Different Filaments – Plus, Where to Get High-Quality Materials in Canada 0

Bambu Lab 3D printers, such as the popular X1 Carbon, P1S, and A1 series, are known for their speed, accuracy, and user-friendly features. But to get the most out of them, it’s important to properly configure your printer based on the material you're using.

In this article, we’ll walk you through recommended settings for different materials and show you where to get high-quality, compatible filaments right here in Canada—at DigitMakers.ca. In addition, please find the attached link for the DigitMakers Configuration file.

👉 Click here to download the configuration file

🔧 Configuring Bambu Lab Printers for Different Materials

Bambu Lab printers come preloaded with profiles for popular filaments, but tweaking settings can help reduce print failures and boost quality. Below are guidelines for key materials:


PLA / PLA+

  • Nozzle Temp: 190–220°C

  • Bed Temp: 45–60°C

  • Cooling: 100% fan

  • Speed: Up to 250mm/s (thanks to Bambu’s CoreXY and active vibration compensation)

Tips:

  • Use glue stick or textured PEI to avoid warping.

  • Enable “flow rate calibration” in Bambu Studio for better dimensional accuracy.


PETG / PETG+

  • Nozzle Temp: 230–250°C

  • Bed Temp: 70–90°C

  • Cooling: 50–80% fan

  • Speed: 150–200mm/s

Tips:

  • Use lower fan speeds to avoid stringing.

  • A smooth PEI sheet works well; avoid textured surfaces that PETG can fuse to.


ABS / ASA

  • Nozzle Temp: 240–260°C

  • Bed Temp: 90–110°C

  • Cooling: 0–30% fan

  • Speed: 100–180mm/s

  • Enclosure: Strongly recommended (X1 and P1S are enclosed by default)

Tips:

  • Enable draft shield in Bambu Studio.

  • Use brim or raft to reduce warping.


TPU / Flexible Filaments

  • Nozzle Temp: 220–240°C

  • Bed Temp: 50–60°C

  • Cooling: 50–100% fan

  • Speed: 30–60mm/s

Tips:

  • Use direct drive models (like the A1 or X1) for best results.

  • Lower retraction and slower speeds improve consistency.


Carbon or Glass Fiber-Reinforced Filaments

  • Nozzle Temp: 250–270°C

  • Bed Temp: 70–100°C

  • Cooling: 0–50%

  • Nozzle: Hardened steel or ruby (Bambu printers with hardened nozzles are compatible)

Tips:

  • Enable high-temperature profiles.

  • These materials are abrasive—always use compatible hardware.


🧵 Get Top-Quality Filaments at DigitMakers.ca

Whether you're a hobbyist or a pro, using quality filament is crucial to getting great results.

🌿 D3D Sigma PLA – Made in Canada

  • 100% Natureworks Ingeo PLA

  • Non-brittle formula, perfect for high-speed printing

  • Fully compatible with Bambu Lab AMS and spools

  • Available in a wide range of vibrant colors

💪 D3D PETG

  • Stronger and more temperature-resistant than PLA

  • Excellent layer adhesion

  • Low odor and easy to print

🌞 D3D ASA

  • UV-resistant, weatherproof—ideal for outdoor prints

  • Great for engineering parts or functional prototypes

  • Low warp and consistent diameter

🧽 TPU – Flexible Filament

  • Shore hardness options

  • Great elasticity and rebound

  • Compatible with direct-drive Bambu printers


🚀 Why Choose DigitMakers?

✅ Canadian-based stock = faster shipping
✅ Excellent customer service
✅ Filaments tested in-house on Bambu Lab, Prusa, and Creality printers
✅ Affordable pricing without sacrificing quality


🔗 Shop Now and Take Your Prints to the Next Level

Looking for reliable filament for your Bambu Lab setup?
👉 Browse our materials at DigitMakers.ca

  • Store Front
Why You Should Always Unplug Your Bambu Lab 3D Printer Before Changing the Hotend

Why You Should Always Unplug Your Bambu Lab 3D Printer Before Changing the Hotend 0

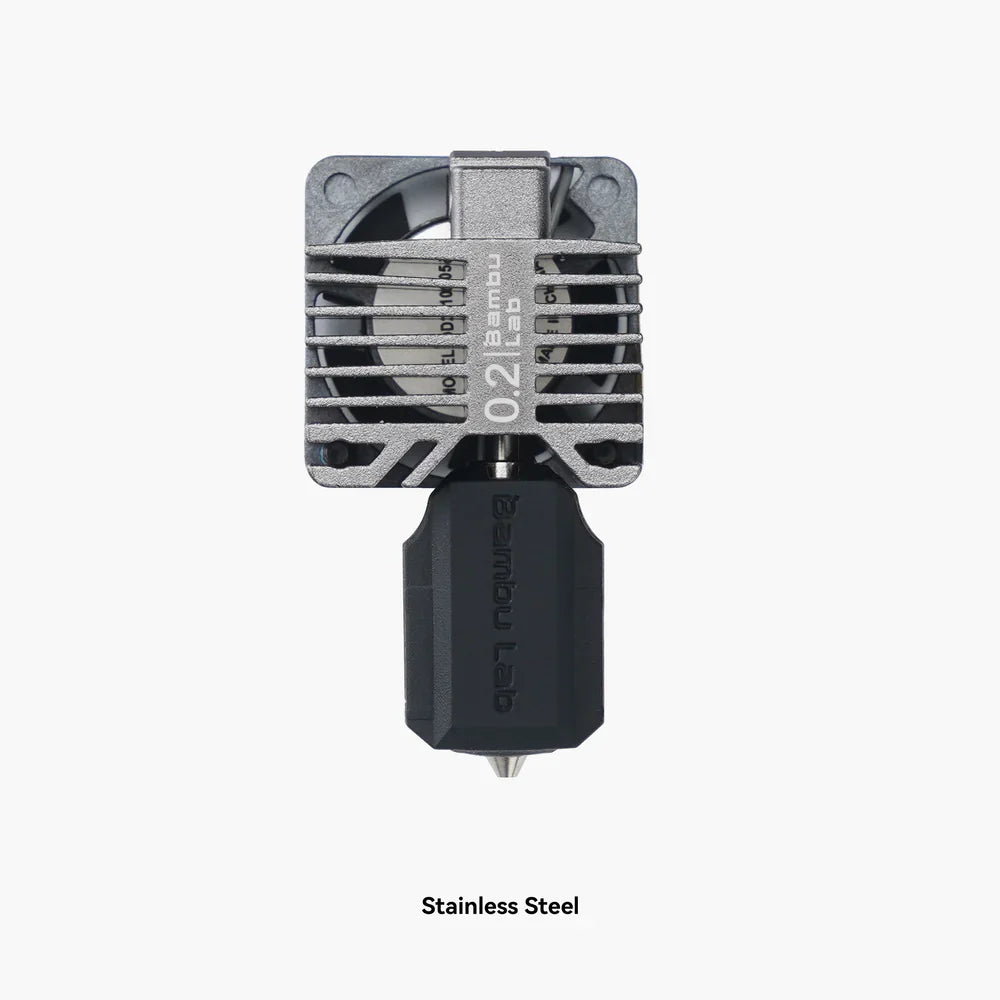
Bambu Lab 3D printers are among the most innovative and user-friendly machines on the market. However, while working on any part of your printer—especially the hotend—is essential to unplug your printer before changing the hotend.

Steps to Safely Change the Hotend

  1. Power Down and Unplug
    Ensure the printer is turned off and disconnected from the power source. This step eliminates the risk of electrical shock or accidental activation.

  2. Allow Cooling Time
    If the printer was recently in use, allow the hotend to cool completely. This prevents burns from residual heat.

  3. Follow Manufacturer Instructions
    Consult the Bambu Lab Wiki  for detailed instructions on hotend replacement.

  4. Reassemble and Test
    After replacing the hotend, double-check all connections and components. Once everything is secure, reconnect the power and test your printer.


  • DigitMakers Team

About Digitmakers Rewards Program 0

X1E 01.01.00.00 Firmware Update 0

X1E New Features

1. Motor Noise Cancellation

2. Simplified Binding Prerequisite

3. Enhanced third-party filament support (in conjunction with Bambu Studio V 1.8.1 and up)

4. Automatic Chamber Cooling

5. Authentication when connected by Ethernet

  • Store Front

Selecting 3D Filament for your 3D Printing Needs 0

  1. Understand your requirements: Before selecting a filament, consider the specific requirements of your project. Think about factors such as strength, flexibility, durability, heat resistance, and aesthetic qualities. This will help you determine which filament properties are crucial for your intended application.

  2. Filament Types: There are several common filament types available for 3D printing. Here are some popular options:

    • PLA (Polylactic Acid): PLA is the most widely used filament for beginners due to its ease of use, low warping, and minimal odor. It's a biodegradable thermoplastic derived from renewable resources like cornstarch or sugarcane.

    • ABS (Acrylonitrile Butadiene Styrene): ABS is known for its durability and impact resistance. It has a higher melting point than PLA and requires a heated print bed. ABS emits potentially harmful fumes during printing, so it's recommended to have good ventilation or use an enclosure.

    • PETG (Polyethylene Terephthalate Glycol-Modified): PETG offers a balance between the ease of use of PLA and the durability of ABS. It is strong, flexible, and has good chemical resistance. PETG is also food-safe and suitable for making functional parts.

    • TPU (Thermoplastic Polyurethane): TPU is a flexible filament ideal for producing objects requiring rubber-like properties. It is resistant to abrasion and offers excellent elasticity.

    • Nylon: Nylon filaments are known for their high strength, durability, and resistance to impact. They are commonly used for functional parts that require toughness and wear resistance.

    • Others: There are various specialty filaments available, such as wood-fill, metal-fill, carbon fiber, and conductive filaments. These offer unique properties and finishes for specific applications.

  3. Consider Print Settings: Different filaments have specific printing requirements. Check the recommended print temperature, bed temperature, and cooling fan settings for the filament you are considering. Make sure your 3D printer can achieve these settings.

  4. Filament Diameter: Filament typically comes in two standard diameters: 1.75mm and 2.85mm (3mm). Ensure that the filament diameter matches the specifications supported by your 3D printer. Using the wrong diameter can lead to printing issues.

  5. Brand and Quality: Consider the reputation and quality of the filament manufacturer. Well-known brands often provide consistent quality and reliable customer support. Read reviews and user experiences to get an idea of filament quality.

  6. Cost: Filament prices can vary significantly depending on the type and brand. Cheaper filaments may have inconsistent quality, while more expensive ones may offer enhanced properties. Consider your budget and balance it with your required filament properties.

  7. Color and Finish: Filament comes in a wide range of colors and finishes. Choose a color that suits your aesthetic preferences or the requirements of your project. Keep in mind that specialty filaments may have limited color options.

  8. Environmental Impact: If environmental sustainability is a concern for you, consider filaments made from renewable sources or those that are biodegradable.

  9. Test and Experiment: It's always a good idea to test different filaments to see how they perform in your specific printing setup. Experiment with different settings, layer heights, and speeds to optimize your prints.

Remember, selecting the right filament is crucial for successful 3D printing. Take your time, do some research, and consider the specific needs of your project to make an informed decision.

  • DigitMakers Team
sb